HOME\ DIY INSTALL GUIDE
DIY ARTIFICIAL TURF INSTALLATION GUIDE
Impressive Turf Solutions is committed to offering flexibility to all our customers. You can choose to use our installation service in the greater Brisbane area, or install your artificial grass yourself. We’re proud to supply Australian-made, high-quality artificial grass for DIY installation across Australia.
DOWNLOAD QUICK GUIDE
If you choose to install your own artificial grass, we recommend first downloading and reviewing our DIY Fake Grass Installation Guide.
How to Install Artificial Turf - Impressive Turf Solutions
Congratulations! You are just a few steps away from having a lush looking green lawn. If you have chosen to install your new artificial turf yourself, this guide will walk you through all the materials you need and steps to get the job done.
Before you begin, make sure you have gathered up all of your supplies:
• Tape measure
• Shovel
• Road base
• Synthetic turf
• Roller
• Utility knife
• Pegs
• Fine sand
Step 1: Prepare the Surface
If you have existing grass on your lawn, you’ll need to remove it before you begin laying your new synthetic lawn. Using a shovel, scrape off the top layer of grass, aiming to remove approximately 100 mm of your existing lawn or base. Check with your local authorities for guidelines for properly disposing of soil. Once that is removed it’s a great idea to go round and give it a good spray of weed killer to kill any embedded seeds.
Step 2: Lay the Base
On your newly cleared surface you will apply roughly 50 to 100 mm of road base also known as crusher dust. Use a wheelbarrow to spread the base around evenly. This base will help to create a level platform for your new artificial turf, and also encourages proper drainage. Ensure you slightly level the road base to dip very slightly towards your drains this will prevent water from pooling.
Step 3: Compact Your Base
Lightly wet the area with a hose and then use a heavy roller to compact the road base. Go over it several times as needed to ensure that the area is stable and flat. An uneven base can result in poor drainage or a lumpy looking lawn—neither of which you want! Wetting the area is an important step, it turns the crusher dust into a harder concrete-like bed.
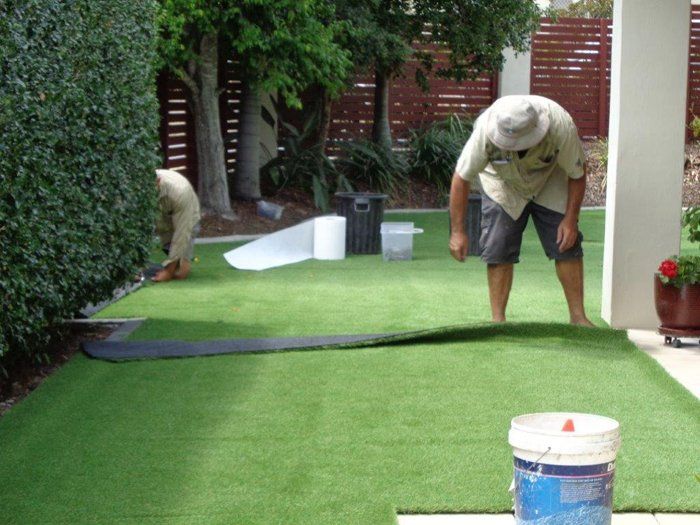
Step 4: Lay Your Artificial Turf
Roll out your new artificial turf and avoid dragging it across the base that you just prepared. We suggest allowing the turf to sit in the sun from 30 minutes to an hour prior to installing so that it can expand. Pay attention to the blade direction and stitch patterns if you are working with multiple rolls, as you’ll want them to be consistent. Knee pads might be helpful as you crawl around manipulating the turf. Your Artificial Turf will come in rolls straight from the factory, allowing the sun to heat up your turf will allow it to be more malleable and activate the individual strands of grass, this process will continue for the next few weeks.
Step 5: Trimming and Joining
Once your turf is laid out and in place, use your utility knife to make cuts as needed. The back of the matting has stitches that go all the way through so it’s easy to follow the stitching as a guide and make a clean cut. Be sure to leave a little extra at the edge to help you make a clean and staright border in the next step. If you needed to join two rolls of turf in any location, use tape and/or synthetic turf adhesive and then brush over the tuft to blend. Bring it as close as possible together so you can avoid seeing the join once it has been installed.
Step 6: Secure Your Artificial Turf
Tuck the edge that you left into the border using pegs placed every 150 mm along the perimeter. Use additional pegs to reinforce seamed areas. Properly securing your artificial turf will help it to look good for a long time to come. This step will also make it harder for dogs and pets to rip up your turf and will also make it easier when you have heavy duty wear and tear such as vehicles driving on it, especially if you are installing out the front of your house.
Step 7: Spread Your Sand
Infill is a crucial step to maintain the appearance and performance of your artificial turf. Check with our specialists for infill requirements. We recommend using fine grade sand, which should be evenly dispersed across your artificial turf. There will be many people advising you that you do not need to place sand down if you have good quality synthetic turf, we have been in this industry a very long time and can assure you that sand makes the world of difference even on the highest quality rubber backed artificial turf.
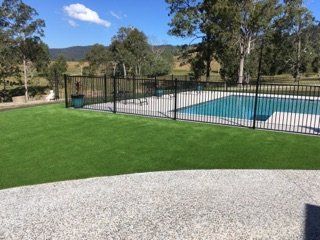
Step 8: Enjoy Your New Synthetic Turf!
You’ve made it to the end! Now you have the beautiful green lawn you have always wanted. You never have to worry about watering it or dealing with those pesky areas that just won’t grow grass, no matter how much you fertilize it. Your property now oozes curb appeal!
Get expert advice and come into the showroom, Impressive Turf Solutions’ showroom is located in Brisbane and the team are always ready to help you choose the perfect turf for your residential or commercial property. This will give you the chance to ask questions if you are unclear about any steps before you start installing your new artificial turf.
If this all sounds like too much to take on yourself, contact us
and we can help arrange installation for you.
